When miking a Harp you need to realize that a Harp can be difficult like a Grand Piano. You may want to use more than 1 mic, find a sweeter spot that gives you the best balance by moving away from the strings a bit or experiment with location, and be a little daring. Use this as a Starting Point for finding the best spots and the best mics. How to mic a Harp?
Live
1 Small Diaphragm Dynamic Mic approx. 20 inches from the Pillar pointing down towards soundboard or Slightly behind the Harp, pointing down.
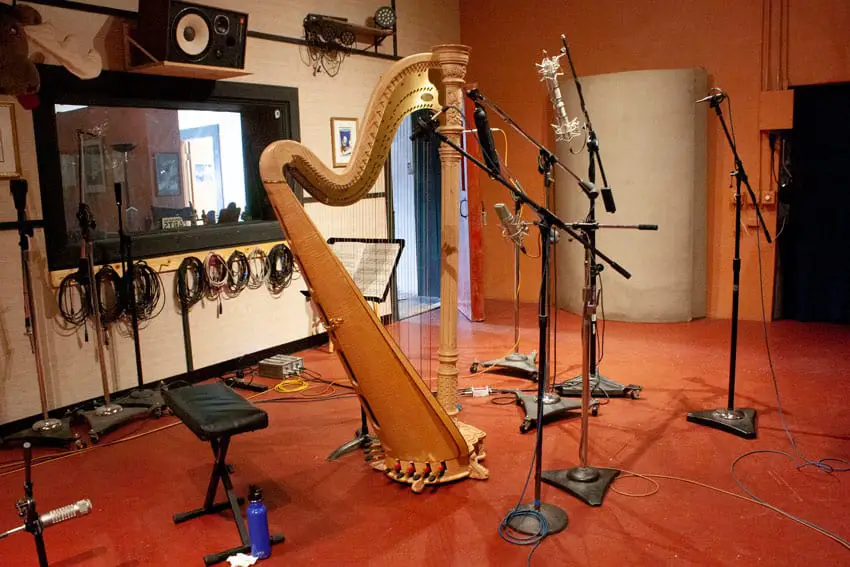
Recording
1 Mic Mono Recording large-diaphragm condenser placed just above the soundboard.
Or about 2 feet back from the center of the strings
With the right Microphone and Placement, the beauty of the Harp can be realized and enhanced but without these two, well-known ingredients, the wide array of frequencies it can produce will be muddied and left behind.
Harp Soundboard
Harp has been around for a long time. In Egypt as far back as 1500 BC and may have been present in Mesopotamia which is Iraq as far back as 2500 BC. Harps are beautiful instruments to the eye and often remind viewers of the instruments angels allegedly like to play in heaven.
Harps normally stand between two and six feet (60 to 180 cm) in height and have between 22 and 47 strings. Used in Orchestras around the world and by Soloist, they are a beautiful sounding ancient instrument that demand to be played and presented the right way.
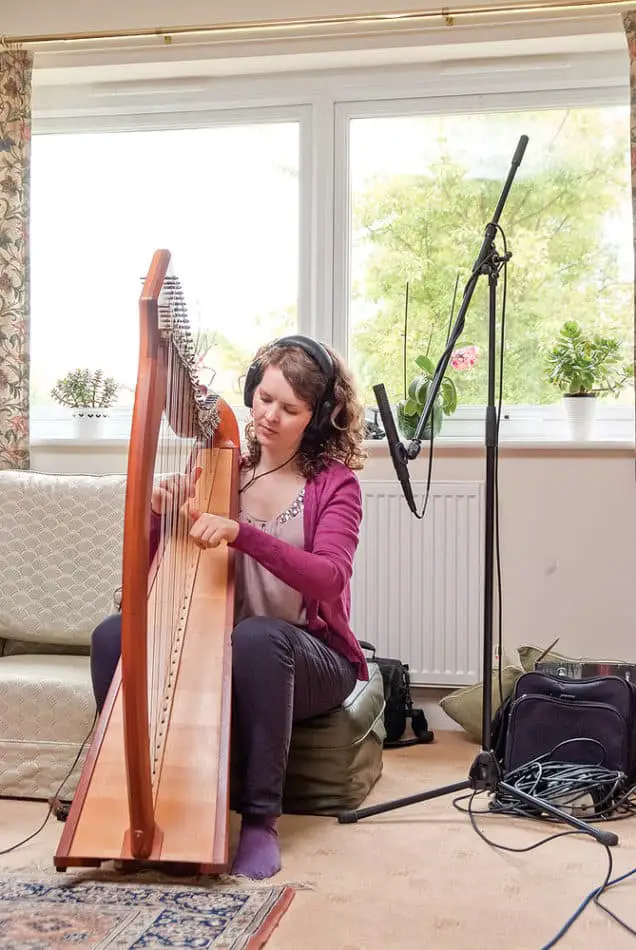
To understand how to properly mic a Harp if you have to know how a Harp creates a sound. A Harps is a stringed instrument where the strings attach to the top or neck of the Harp. They then run down the length of the Harp and are inserted into small holes on the Soundboard. On the other side of the post, the string is attached and tied to a post. This tension keeps everything taught in front of the Harp.
Concert harps are large instruments. If you get too close, you run the risk of getting in the player’s way. 20 inches is pushing it but should do it, but should be sufficient room. Harps like other strings sound just fine with small diaphragms. Generally around 20 inches from the instrument.
The instrument tips quite significantly when the player performs. So be sure to set up the position while the player is actually playing at the instrument, otherwise, you may find your placement to be quite different and wrong lacking sound.
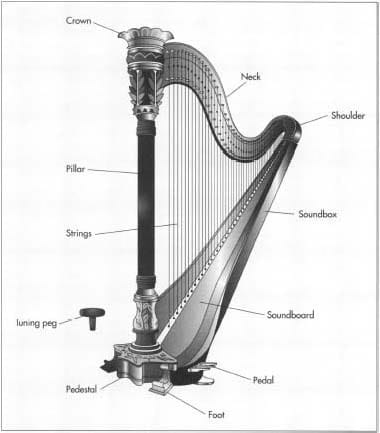
There is a Bridge that attaches and is fixed at the base of strings and connects the vibration of the strings to the Soundboard of the Harp.
Several of the parts of the Harp help to make it’s sound loud enough to be heard throughout a room or concert hall. The soundboard is usually made of Sitka spruce that is the same wood used in piano soundboards.
It’s caused to vibrate by the vibrating strings that are firmly fastened to it. Then, in turn, the soundboard causes the air within the volume enclosed in the soundbox to vibrate, acoustically amplifying the sound produced by the vibrating strings.
So when you pluck a string the vibration travels down the string to the base and through the holes in the bridge and hits the Soundboard and projects outward.
How To Mic a Harp Live
The Most Popular Placement -A very good placement and a starting point is an area around the top of the Harp’s Pillar, with the microphone capsule pointing down towards the soundboard of the Harp. The microphone should be moved further away from the harp if there is room for the player given the space he or she is in.
This placement will bring out the higher frequency aspects of the harp without sounding too boomy. As a side effect, it will often transport the Harp slightly to the foreground of the orchestral sound image. If this effect is not wanted then different positions can be tried. Experiment, slightly moving behind the harp, pointing downwards from the right essentially opposite the player’s head, just a little higher.
Another good placement for Orchestra and Live play have been reported by using 2 Dynamic cardioid microphones with a tighter smaller field. Which works better for the stage play. One from right behind the harp, facing the Soundboard from about 20 in. distance, the other looking at the soundboard horizontally, from about the same distance.
The two microphones are then mixed with the top microphone twice as loud as the lower one. The two microphones need not be panned to the left and right channel, as the harp has very little horizontal stereo image.
Harp Microphone
Most of the sound resonates from the soundboard and from the soundhole, which is located under the harp, opposite of the soundboard. Just like any instrument the best place to mic that instrument is at the sweet spot.
The best place to find a sweet spot is to have one person play the instrument and another walk around the room and listen. The room is part of that process and the bigger the instrument the bigger the room.
Single Microphone Placement Technique Mono Recording
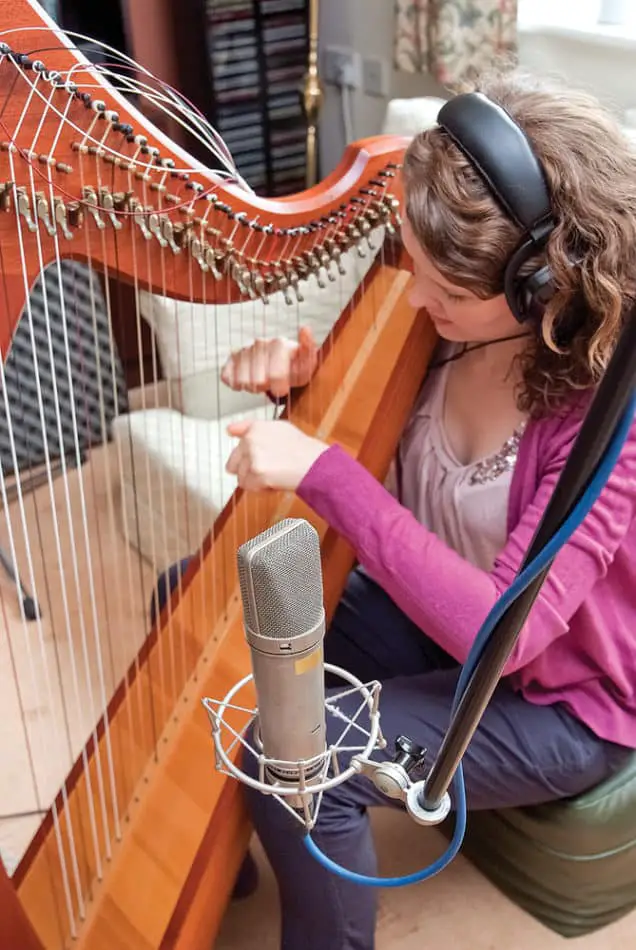
The Most Popular Technique -Use a large-diaphragm condenser in cardioid polar pattern, placed just above the soundboard. A good mic to use is Neumann U 87 Ai Switchable Studio Microphone or an Audio-Technica AT4040 Cardioid Condenser Microphone which is a whole lot cheaper than the Neumann but a quality Harp mic none the less. Place the Large-Diaphragm mic about 2 feet back from the center of the strings.
How to Record a Harp
Two-Microphone mono recording Technique
Using a small capsule condenser placed above player pointed at the Soundboard, RE27 behind the player, positioned lower to the floor, and pointed at the soundhole. Blend the two together to balance the plucking strings with resonate sound. Used by some players but not highly recommended because of differences of opinion on recording from the Soundhole on the Harp.
Another well-known Technique was using a Ribbon Mic – Use something like an R88 MK2 Stereo Ribbon Microphone Stereo Ribbon Microphone placed a couple of feet in front of the player several feet off the ground, slightly angled down toward the soundboard at head level as the start then make adjustments.
Stereo Microphone Bar
An easy to use and well-known technique used in all kinds of recording. X/Y Pair – uses tube mics in cardioid, as a Rode NT4 X/Y Stereo Condenser Microphones placed a little further away in front of the instrument, several feet off the ground, slightly angled down toward the soundboard. Although the placement is similar to the AEA, these mics have a much brighter sound. Start with the microphone set for X/Y about 15 feet back and probably about 12 feet high. Depending on the room this could be the best Set-up.
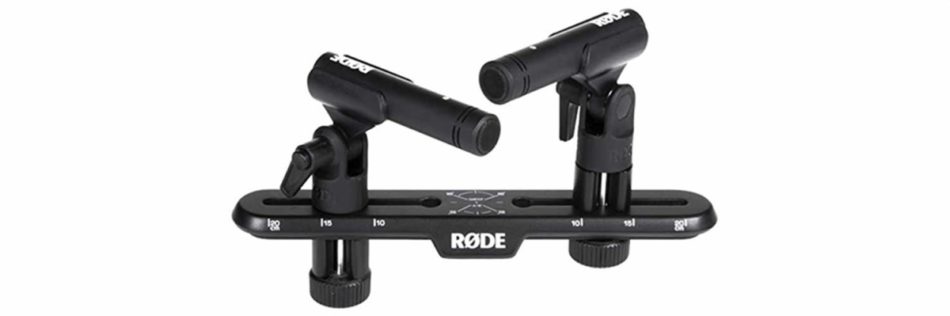
Use this handy feature called the Rode SB20 Stereo Array Spacing Bar Microphone The Mount is an easy tool to make proper positions and placement when using an X/Y Technique that can be used for all types of instruments and all kind of settings.
Like all Mic placements and positions, it subjective and for you to pick what your preferences are. The room has a lot to do with it. Most people aren’t recording from a professional studio and with access to thousand dollar microphones.
The Harp like the Piano is a hard instrument to mic in a studio or an Orchestra setting. Wit one quality microphone you can make your Harp sound fantastic as long as the placement is in a good location.
JimGalloway Author/Editor

MikingDesign.com