If you’re recording music in your home studio and you want the sound of huge, fullness roaring guitars and drums that are big as Zepplin’s John Bonham, but you don’t have space or equipment then you need to add another mic or 2 dedicated to creating Ambience to the room. How Do You add Ambience to a Sound Recording?
Using a Preferred 1 or 2 Ribbon Stereo Mics or any type & size mic available, you can Set up a Room Mic to create & change the Ambience in any size room adding depth, tone, natural reverb, character & atmosphere for recording purposes using:
Mic Placement
Distance
Polar Patterns
Direction
Reflection
Using certain techniques and mic placements you can create fullness in a small room that you never thought possible. Use these guides and practices for recording drums guitar or vocals and let’s make some big noise.
What Does Ambient Sound Mean
Ambient miking is the placement or position of the microphones at such a distance that the room sound is more prominent than the direct signal. This technique is used to capture audience sound or the natural reverberation of a room or concert hall.
It’s contrary to what we were taught about how to mike sweet spots on guitars, drums, and amps for recording the fullness of the instrument’s sound. The reality of the situation is that most of us work in bedroom size spaces that are not constructed for recording music.
Capturing a live set of drums is easier in a room that is acoustically right specifically for frequencies that occur when performing on drums. Enough said.
There are a few things you can add afterward mixed in like reverb and delay that can enhance the sound to make it appear bigger. You already know this. At the beginning of MikingDesign.com, we talked about the first EQ on a recording is the room itself and where your drums or other instrument are in a room can make a huge difference.
Without technical mumbo-jumbo just run some test and move your amp or drums around then change your mic positions and placement using the room you are recording in as a Base and working off that. Sound is reflected bounced and absorbed differently with the slightest of moves. Making a few changes in your bedroom by moving the bed or chest of drawers around or across the room can sonically change the Ambiance of a recording.
The ambiance is another word for an atmosphere in the sense of the mood a place or setting has. In a recording, it reflects background noise consists of the sounds of a given location or space. Every space or environment has a different type of ambiance that comes with it. Dead spaces control ambiance where the sound absorption can cause high frequencies to be rolled off, dulling, and drying the sound further. Most Rooms are Miked in Stereo.
Microphone To Pick Up Whole Room
The Room Mic that most Engineers use today is called a Ribbon Mic. What is a ribbon mic? A ribbon mic is a special kind of dynamic microphone. Still, popular with a dedicated following, Ribbon Mics first hit the scene in the 1920s, they were pretty much the only game in town.
Instead of a moving coil attached to a diaphragm, ribbon mics feature an extremely thin strip of metal often aluminum suspended in a strong magnetic field. The ribbon acts as both the diaphragm and the transducer element itself, providing the same kind of sensitivity and transient response you’d expect from a condenser, but with a wholly different character.
Ribbon mics are highly detailed and with that trait, allows them to pick out the nuances of close sources while remaining isolated from room noise and off-axis sound that would bleed into most condenser microphones. But its directionality makes the Ribbon mic a useful aspect in its design. All ribbon mics are naturally bidirectional, giving them a figure-8 polar pattern.
The sound from the sides will be blocked out by the noles on the capsule. This is great when pointing the mic for capturing what you want and canceling what you don’t. They have a reputation for producing a more natural sound the says a Condenser mic that will add color. Still pairs of Condenser Microphones are used successfully for room miking most Engineers believe there is more control using a Ribbon mic.
Ribbon mics were long-time favorites of radio and television talk show hosts because a single mic could capture both sides of a conversation, while the mic’s sides could be pointed at the audience or equipment to block out noise for an extra factor of control. This way of canceling sound will work better at shorter distances than 10 feet out but it is another layer for the recorder to use to control Ambiance in the room.
A sensitive Ribbon mic built with these standards like the sE Electronics Voodoo VR1 Ribbon Microphone achieving a full-range frequency response is a popular one use today that can capture higher ends that the older Ribbons couldn’t.
Ribbon mics also have the characteristic of being both quiet and dark, and there is a good reason for this. Classic ribbon mics come from an era when microphones used far higher impedance in their circuitry, so what is expressed as a lack of volume is often a combination of lower output and mismatched impedance. So a good preamp should be used to jack things up some.
Room Mics for Live Recording
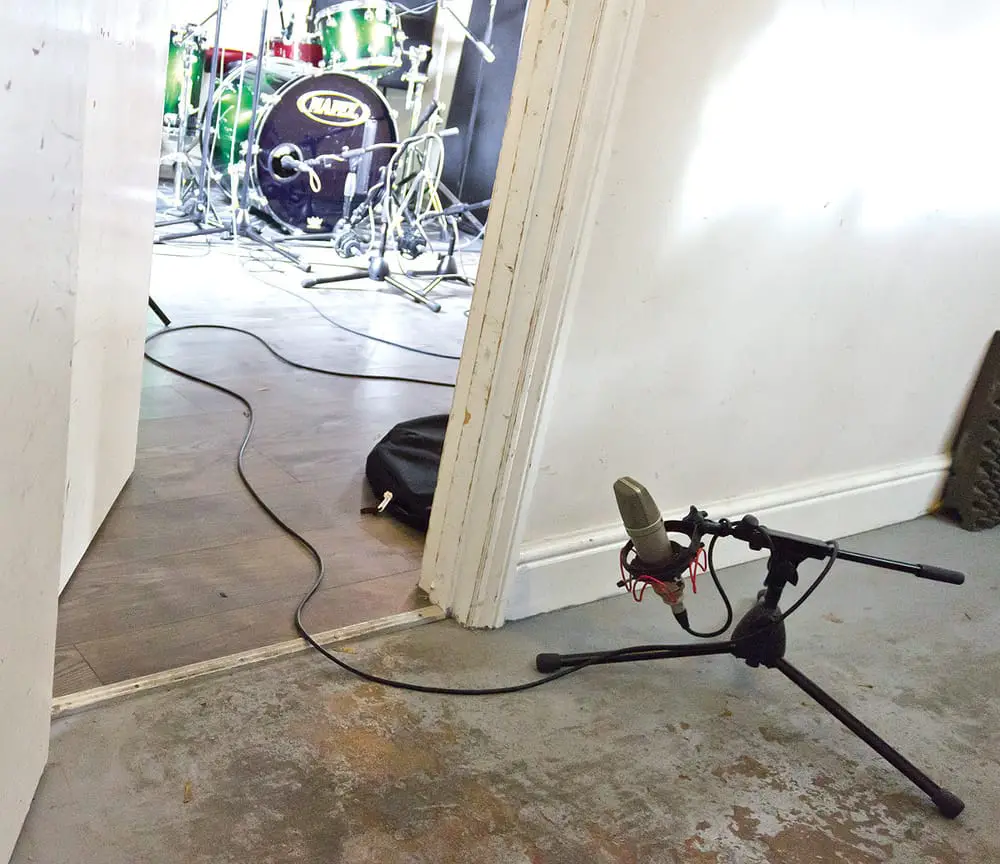
Reflecting in any room will add ambiance and work with any mic in different ways. Room Miking some sounding better than others depending on how big the room is and how it’s constructed. While many engineers prefer a large-diaphragm condenser microphone for this purpose, even an SM57 can do a superb job of capturing the overall sound of the Room. Using one Large Diaphragm just outside an open door of your studio or a stereo pair of Small Diaphragm Condenser Mic in far corners of a room facing the walls or corners can get great results. 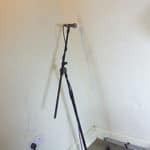 All positions can have unique effects on the recording. Just use your imagination and experiment.
Mics can be placed as close to walls in the studio as possible and there will be sound from the reflection that will be picked up. The source of the sound that is reflected off the wall or even the ceiling can be amplifiers or a drum kit. Lavalier Microphones can be used for the same type of Room miking taped on the wall directly and picking up reflection from any source that projected at the wall.
Another idea is to use a Boundary type Mic that is located on the floor near the drums or farther away in a corner. Leaving small pencil mics laying on a table or the floor.
For these types of mic placements, it’s more important to have the room cleaned out and empty so that the reflection that in the room won’t be absorbed by any furniture. The more reflective the room is the more dramatic the effect can be with better results.
A small airy type mic like an AKG C 451 B Small-Diaphragm Condenser Microphonethats used for overhead miking is a good tool for miking rooms in stereo pair or using one at a time in small spots facing the walls in a room. The room itself doesn’t have to be large. It’s more about the reflective capability of the space.
- Place a pair of speakers at one end of the room.
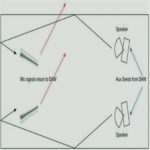
- Aim them toward the side walls to generate tangential reflections, as opposed to facing them directly toward the opposite wall.
- At the other end of the room, set up a pair of microphones.
- The mics can either face the speakers or point them away from the speakers this will allow them to capture even more reflected sound and less direct sound. Facing the mics away from the speakers lengthens the path that sound waves travel from speaker to microphone, giving you the ability to vary the perceived room size.
A different approach to capturing room sound can be obtained using a Boundary microphone like this one by Shure or a Pressure Zone Microphone (PZM). Both employ a flat plate near which the capsule is mounted but work a little differently. A boundary mic is intended to be placed on a flat surface such as a table, lectern, floor, or wall.
Most boundary mic capsules are oriented so that the diaphragm is perpendicular to the plate and thus the boundary. Other boundary mics fit into holes drilled into conference tables and mount flush with the tabletop.
Microphone Distance
- Using a Stereo Ribbon Mic 6-7 feet out and aim the mic at a 45-degree angle towards the center of the Drum Kit. You don’t need a Ribbon or a Stereo and SM 57 will work well it’s all about the position and the sound of the room so experiment.
- Another method for room miking when the room is small is to place the stereo mic directly over the kit, centering in the middle of the bass drum about six feet above. This is in addition to any cymbal mics that you might be using
- Another standard room miking configuration is parallel miking. Place a mic at each side of the kit about 10 feet apart and looking directly at the outside edge of the furthest cymbal. The mics should be between 6 to 10 feet out in front of the drum kit and should sit just on the edge of the kit on an even plane and exactly parallel to each other in height. By keeping the mics parallel, a phase shift is kept to a minimum.
Don’t use any low-frequency roll-off on the microphones if they have one. You want to capture the full frequencies in the room that might come from other mics that are live on your kit. This will fill in any gaps or holes in the spectrum and create a low end from the room mics that can make the kick sound bigger and deeper because the low frequencies will take a bit of distance to develop.
Using the distance from the mic off the drum will add luster and thickness to the frequency. Again because all room has sonic qualities and differences you need to add or take some distance off to find a placement that works well in your space for your kit.
The idea is to make your room sound bigger with more added ambiance available. Room mics aren’t always the rule of thumb. Sometimes a dry-tight recording is all you need. So ask yourself if this what your music needs and will it make the recording sound better.
All placements and distances are subject to your own interpretation of what sounds better. There is no direct formula you’re not setting the gap on a spark plug so feel free to interpret.
Polar Patterns For Mics
When the space you are recording in, is just too small for using Room miking as an option, a practical solution is to use Polar Patterns and Direction that can achieve the tonality sound and Ambiance picked up in the room without the need to distance the mics.
To do this try different mics with different Polar Patterns miking an Amplifier using the nodes on the mic capsule for pointing the mic at the source (amp speaker) along with the room and instead of using distance as we did with the Drum kit we keep that the same. Using 4-5 ft off the Amplifier:
An Omnidirectional mic– will pick up the whole 100 % of the Room and the Guitar Amp.
A Cardioid mic pointed directly at the back of the room which will only pick up sound that is reflected from the back wall of the room.
A Figure 8 Pattern where the mic will be pointed and looking at the sidewalls of the room for a unique type of sound without moving the microphones far away from the sound source. Then after the recording is finished you can match the volume levels creating a bigger broader thicker recording that you could never get in a small room your using Room Mics in a home studio.
This video explains the process and then uses the mic placement technique perfectly in Three Ways To Set Up A Room Mic Using Polar Patterns
Room Mic Placement
If you are deciding to use a Room mic there should be a reason maybe your space where you are recording is just too small or want a live audience effect as part of a recording. Maybe you want the sound effect that reflection will bring to the environment. This is all possible with position and placement by the microphones set up in the room. One of the first things to think about is the phase.
Making precise measurements when placing room mics is important. If your microphones are out of phase, you’ll end up with a weak recording. One simple concept to use the simple law of miking called the 3:1 Rule. This idea tells us that for every one unit of distance from the source our first microphone is, the next microphone should be three times that distance from the first mic. For example, an overhead mic on a Drum kit is 40” from the snare.
To be in keeping the rule, you’ll have to position the room mic 120” from the snare. Also, mic placements too close to a corner or wall can trap frequencies making keeping them from bouncing off and reflecting back. You will have to move the Room Mic around to achieve the best sound available in the space.
Also miking the drums closer to the floor can accentuate the lower bottom ends frequencies. So Mic Placement is everything when it comes to Room Miking. Using the walls and floor or just the space in the room will make all the difference.
A general aim is to add more depth but you can add sonic qualities with more experimentation and comparisons. Note the changes you make and make small incremental changes to placement always. The possibilities are endless- use some of these pro techniques on your next recording for a unique sound.
JimGalloway Author/Editor

MikingDesign.com
