Music is made with 7 notes based on frequency and pitch. Step outside in nature and you can find the same frequencies packaged in Nature. But trying to capture something on a mic in an outside environment is a whole different technical strategy. What are some field recording techniques?
- Use Headphones to monitor, aim and set levels on your recording device
- Aim for a -12 decibel volume
- Don’t fiddle with this level in the middle of a recording
- Record on 2 channels at the same time if capable
- Use the right Microphone
- Use a quality Windscreen
- Always set your equipment for the next recording.
The new pioneers in filmmaking are Audio Sound Specialists that are using sounds recorded directly from the source no matter where that takes them.
Field Recording Equipment
Directional miking is a way to step up the game and be able to make a better recording by pinpointing the subjects. There are 2 types of Directional microphones that are commonly used. One is the Parabolic Reflector System and the Shotgun Microphone. A Shotgun Mic is a commonly used microphone for recording birds and other wildlife sounds.
A Directional mic will be an accurate tool for pinpointing sounds within the overall landscape where you are working. The Directional mic is not that expensive and will capture more of what you need leaving outside sources out.
What gives a Directional mic the characteristics it needs to do this is what’s called an Interference Tube it’s a hollow tube with precisely placed slits. Sound pressure waves that arrive at the front of the tube pass unimpeded to the mic’s diaphragm.While sound waves arriving off-axis are slightly delayed at their arrival at the mic’s diaphragm.
At lower frequencies, it becomes least ineffective and less directional. For aiming the Shotgun Mic to what comes naturally and aim for the target. The Shotgun will accept sound from the forward plain and the rear. When you’re pointing the mic the sides of the Shotgun mic should be pointed to the unwanted sounds.
The Windscreen is an important piece to your Shotgun Microphone, especially working in areas where the wind is a big element. In isolated spots gusts of wind will be a huge element than any other kind of landscape recording. The thick fur windscreens are much better than the foam. For dealing with the wind it’s best to have your mic pointing directly into the wind or your back to the wind.
The Directional Mic is the best way to record nature with easy transporting and the point and record method it’s ideal for tracking a target that is moving. The Shotgun mic offers a flatter frequency response than that of a Parabolic. On the downside, the Shotgun doesn’t amplify higher frequencies than a Parabolic mic. It offers no directionality when you are recording at a lower frequency. Still, it will maximize the target of interest.
Recording Nature Sounds
If you are in the wild and of course you brought your cell phone make sure you turn it off when recording or you will pick the sound it emits even if you can hear it. If you’re interested in a target in the woods and you want to approach it try not to walk straight at it. Zig Zag between the cover of the tree and shrubs just as if you were stalking it in a hunt.
If you are using a Parabolic type of microphone you need a clear trajectory between you and your mic with the target. Using a spot with grass and fewer sticks would spook the live target you are interested in. You don’t need to move any closer as long as the, in this case, the (bird)
Recording The Live Subject
Now that you’re set up in a comfortable site the vocalizing bird is within a distance of a good recording you don’t have to take any more steps towards the subject all you have to do is move your arms and pivot your wait to follow the bird and the sound.
- Make sure to put headphones on and fine-tune the aim of your mic and set your levels.
- Set your volumes at your desired peak gain of -10-12 dB
- Exactly where you want it and start the recording.
- Get a full amount of time for a sample of the subject. At the very least 2 minutes of the birds singing.
- Document the subject and narrate the basic information like the name of the bird and how far you were from it and at what decibels you recorded in and any other useful information that you might need for comparison.
Half the Distance
- Put your Headphones back on,
- Aim your mic, check your levels, and fine-tune your Parabolic Mic. Double-check your aim at the bird or sound source.
- Set your desired volume range where the gain and volume were set the first time.
- Start to record.
- Then document the memo of what-when and where. The Species and the microphone setting. Also, record the weather conditions and temperature. Type of recording equipment and mic.
- Both distances. File it.
- Always set your equipment for the next recording. So you are not caught off guard.
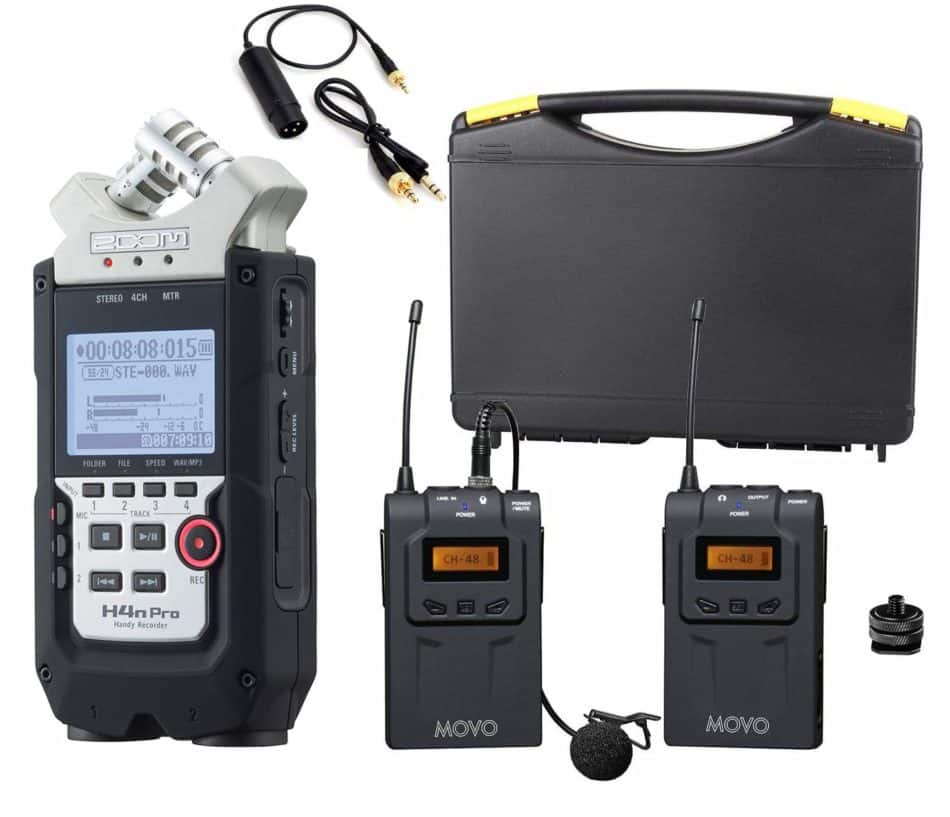
Zoom H4n PRO 4-Channel Handy Recorder Bundle with Movo UHF Wireless Lavalier Microphone System
Outdoor Audio Recording
To record quality audio there are Principles used:
Noise is unwanted Sound-when you arrive at a location that is subjected to noise you need to try and minimize it so you get the best signal possible. The signal is the target sound you want to pick up. At a beach trying to record a seagull with the wind gusting and the waves crashing you would need to minimize the natural sound of the beach to focus on the seagull. A few ways to eliminate some of this background noise are to:
Use a quality Windshield
Use your body to separate the mic from the noise (wearing a Lavalier Mic with its own windshield can do this)Come back at a different time when the noise might be quieter assess the environment in the morning or late afternoon
Monitor with Closed-End Headphones
Headphones will be most useful when you are setting up new environments to record. They will establish noises that are minute but can’t notice them without them on. Much like a buzz on the neck of a guitar that you can’t hear at first unless you have the monitors on. Make sure your cell phone is off. Cell phones interfere with electrical equipment.
Outdoor Microphones
There are a few like we discussed :
The Camera Mic-The built-in Mic-Learning as much about this mic can be an advantage if this is the only one available or combined with other Mics. Usually, these mics are Omnidirectional mics, thin and unfocused. The polar pattern will pick up everything that is surrounding the camera and where the camera is located at the time you are filming.
The Video Mic Pro- is a better quality Mic that is cradled in a Shockmount that will isolate it from handling noises real well. The best part of this mic is that it has a Super-Cardioid Polar Pattern that can pick up the intended target and reject the noise from the sides. The problem again with the Video Mic Pro is that it is limited because of its position on top of the camera.
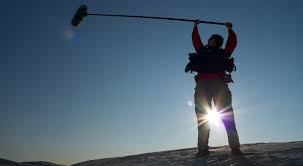
Shot Gun Mic- with a Super-Cardioid Polar Pattern that employs XLR connectors just like a Studio microphone works in your Home Studio. The mic is positioned on a Boom Pole which allows the mic to get close to the sound source. The mic on a Boom will be a Pro audio quality standard mic that performs a lot better than the camera’s mic or the Video Mic Pro.
Lavalier Mic-which depending on the brand and the quality can be plugged via a 3.5 mm jack and a portable Digital Recorder you can carry along with you giving you the freedom of recording anywhere the wind blows. These mics have an Omnidirectional Polar Pattern.
This mic actually sounds better than the others at least here in the field and out of the studio because of the close proximity to the source of your mouth. The Lavalier mic or sometimes called the Lapel Mic can be clipped directly onto your clothing up close to your face. This solves all the other microphones problem that has to do with Positioning in a recording.
Positioning Your Mic
Handling noises- Taking off and putting on a Lapel mic can be abrupt and even ruin your audio. It’s best to hook up on the inside of your clothing to eliminate any rubbing noises that will happen when you move. A clip is necessary to raise the mic up and away from the wearer’s body. We have all seen people on live News and Sports shows try to unclip their Lapel mic by themselves and heard the result.
A Lapel mic should be aimed around 6″ from the mouth and clipped on from the middle of your chest. There is a sweet spot just as there is miking an acoustic guitar or amplifier. The kind that Vocal Mics have with SPL like p’s or poppings sounds when you’re too close because of the sensitive nature of the Lavaliers.
Level Adjust
Setting up your levels is something you have to do after you set everything else up and before you start recording. the basic idea is to get the levels set right before you start so you do not set levels before you start recording. On Portable Recorders like the Popular Zoom Recorder H2 all instruments that record audio or music have levels to adjust for clipping. Aim for a -12 decibel signal.
- Wear your headphones
- Aim for a -12 decibel signal.
- If its color-coded keep it Green out of the Red
- Avoid hitting the Red at all cost
- The -12 Db will allow for some extra signal while keeping a strong even signal
- Don’t fiddle with this level in the middle of a recording
- Some cameras have the ability to record two 2 channels at one time. You use both and have one side at a lower volume in case there is a clip during the record mode saving the recording. Which may come in handy someday. Most sound Enthusiasts will use a -12 Db as a constant and a safe volume setting for Ambiance and Nature Landscaping.
Sound production is becoming more and more important in live broadcasts from NFL football games to movie soundtracks where sound used to be filed away as samples and filed away until it was needed.
If you have a Digital Microphone you can get a really close representative sound whether it snowing raining or you are in a canoe floating down the Amazon. Location just doesn’t matter, if you have the right equipment.
With that kind of know-how and the new audio electronic equipment sound producers take their tool of the trade out to nature and create a soundscape that wasn’t possible too long ago.
What is a Boundary Microphone
JimGalloway Author/Editor

References: Tips for Getting Started in Field Recording and Production Sound
